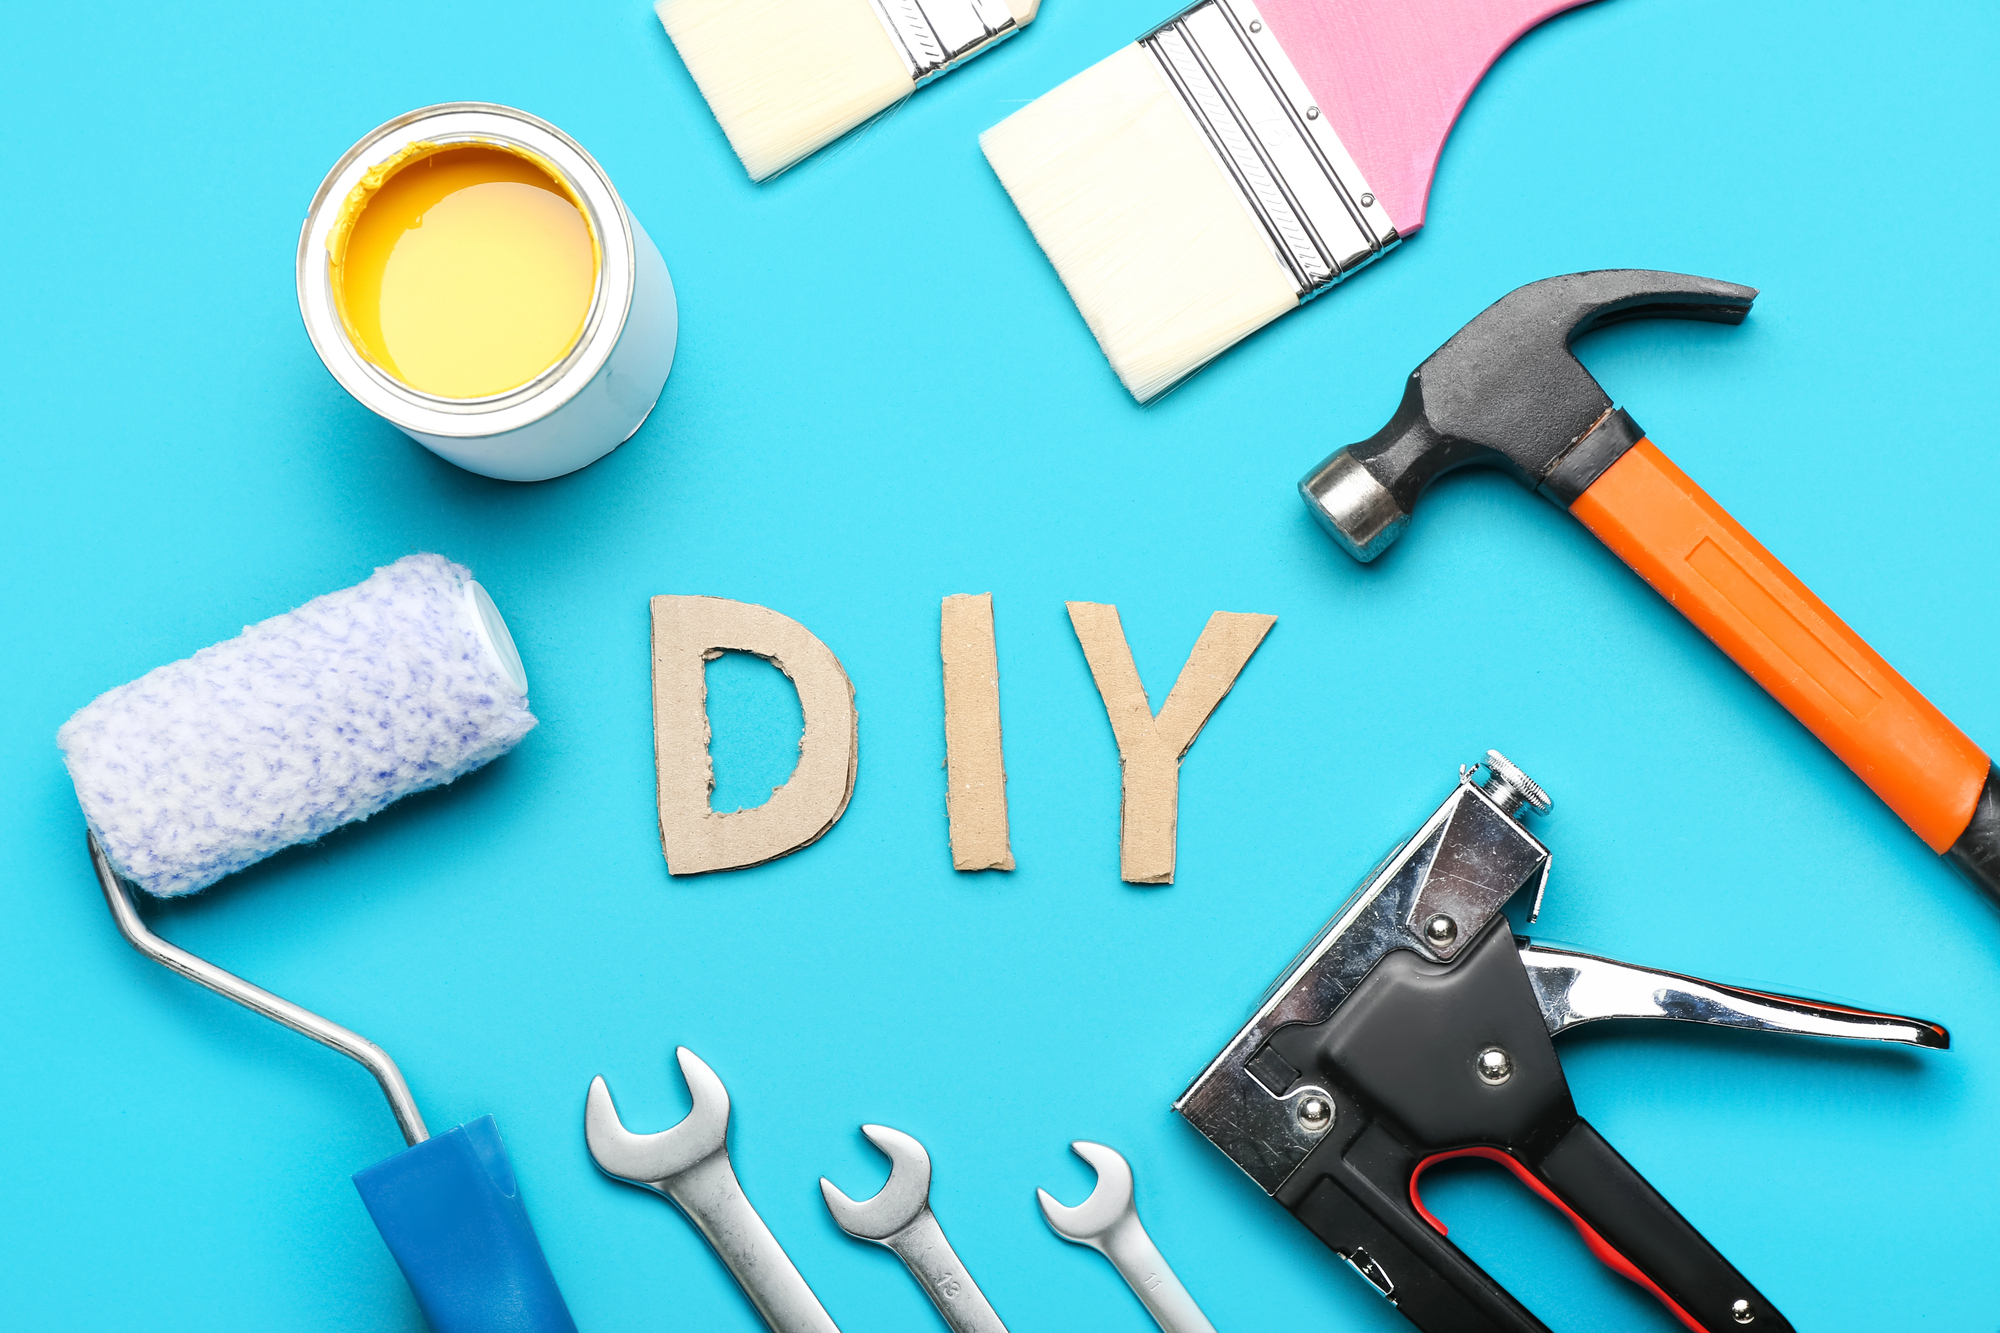
Smart DIY Pet Furniture Concepts
Pet furniture can get expensive fast. A decent cat tree runs over a hundred dollars. A stylish dog bed that doesn’t look like it belongs in a kennel costs even more. And if you have multiple pets or animals that destroy things as a hobby, you’re looking at constantly replacing items. The alternative is making your own, and it turns out that DIY pet furniture doesn’t have to mean wobbly plywood contraptions held together with hope and duct tape. With a bit of creativity and some basic materials, you can build pieces that work better than store-bought options and actually look good in your home. Here’s a look at some clever DIY ideas that your pets will actually use, and you won’t be embarrassed to have sitting in your living room.
Turn old suitcases into cozy beds
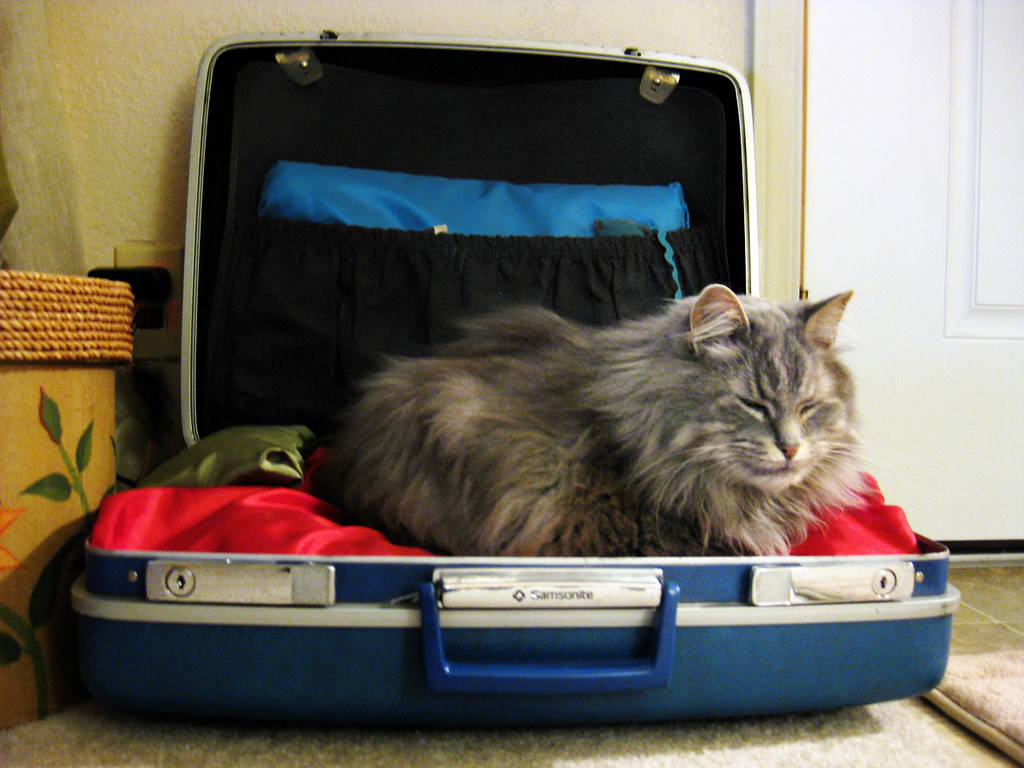
Vintage suitcases have the perfect shape for pet beds—contained, slightly elevated, and with built-in sides that animals love for their sense of security. Find one at a thrift store, add some legs if you want it off the ground, and drop in a cushion or folded blanket. Cats especially love these because they’re den-like and warm, but small dogs work just as well. The suitcase itself adds a quirky, retro vibe to a room, rather than looking like obvious pet gear. You can leave the suitcase as-is for a worn, vintage look, or paint it to match your decor. Either way, it’s functional, portable, and costs a fraction of what you’d pay for a designer pet bed. If your pet outgrows it or loses interest, you haven’t sunk much money into it. And if they love it, you’ve got a conversation piece that doubles as genuinely helpful furniture.
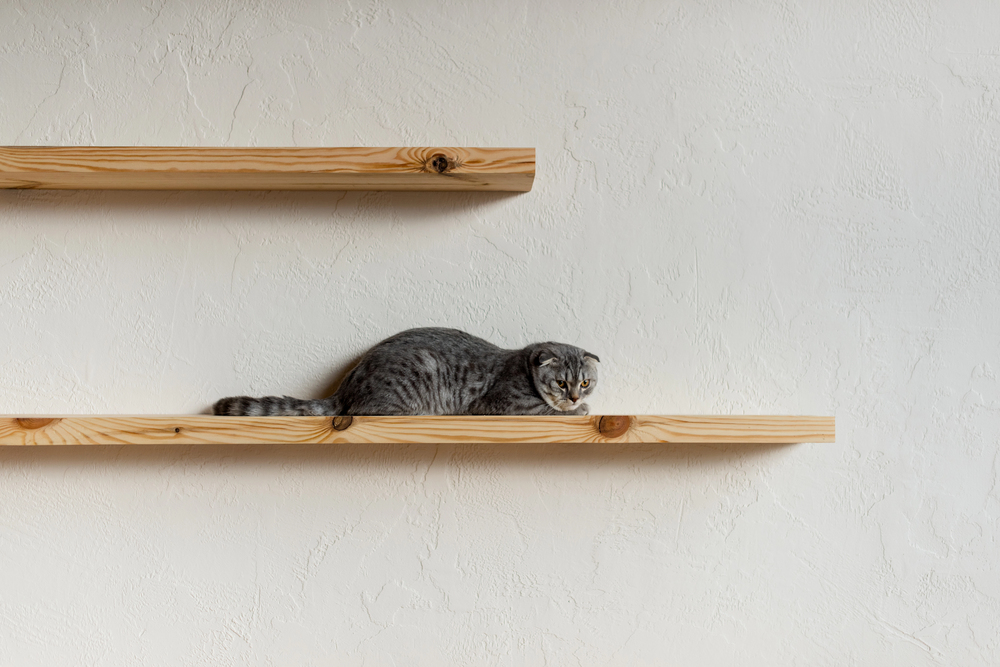
Build a window perch from basic shelving
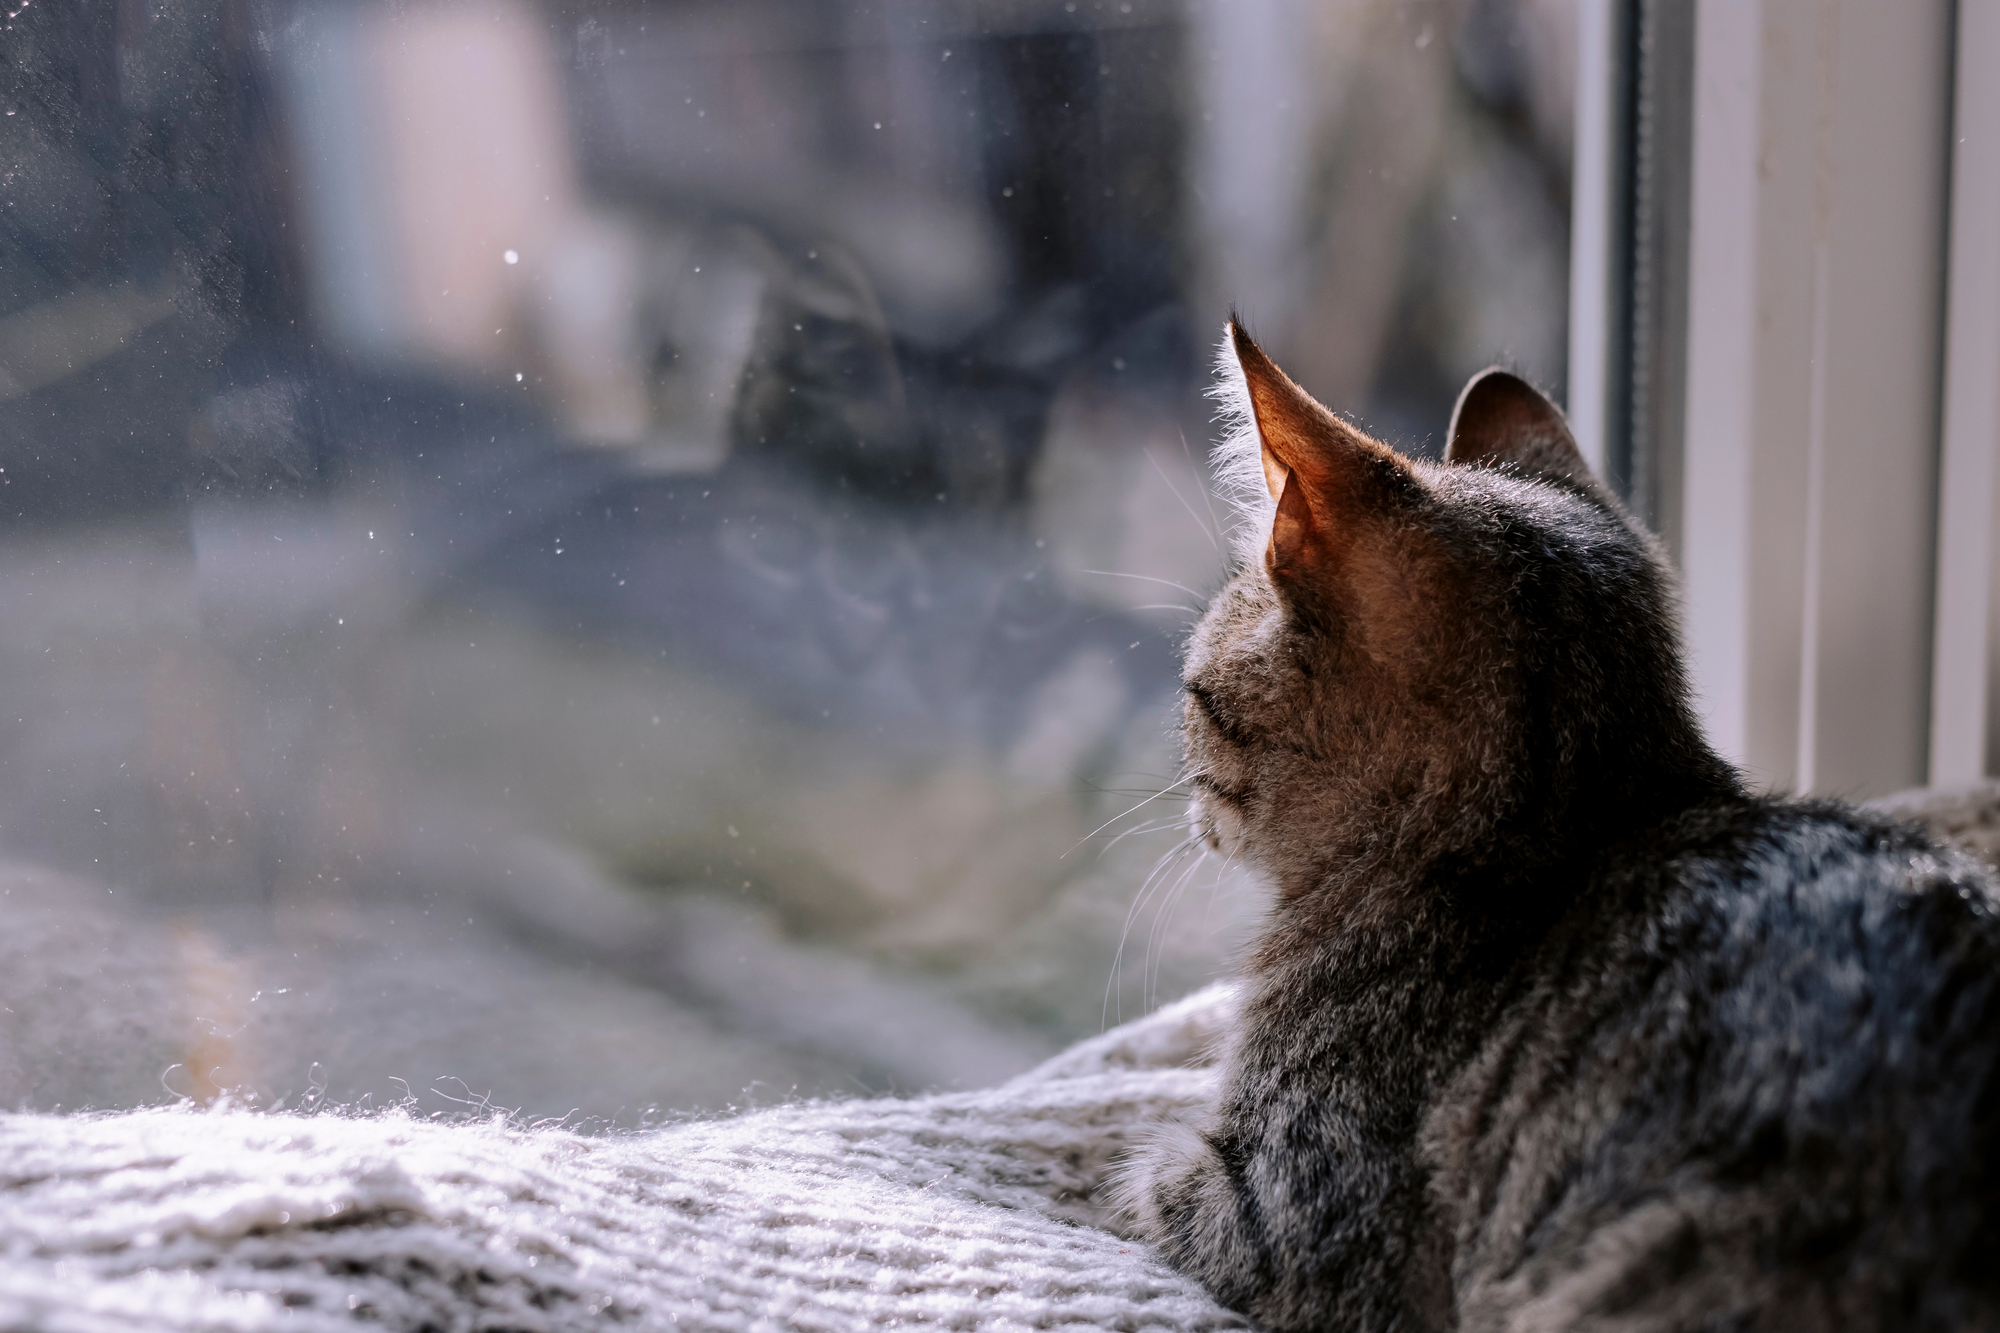
Cats are obsessed with windows, and a simple wall-mounted shelf gives them a front-row seat to whatever’s happening outside. You don’t need carpentry skills for this—a sturdy floating shelf from a hardware store, some heavy-duty brackets, and a cushion are enough. Mount it near a window at a height your cat can jump to, and you’ve created prime real estate that costs maybe 20 dollars. The key is making sure it’s secure. Cats launch themselves onto perches with zero grace, and a wobbly shelf is a disaster waiting to happen. Use proper anchors, check the weight limit, and add a non-slip mat under the cushion to prevent it from sliding. Once it’s up, your cat will spend hours there, and you’ll have freed up space on your actual windowsills. It’s one of those upgrades that seems minor until you realize how much your pet uses it.
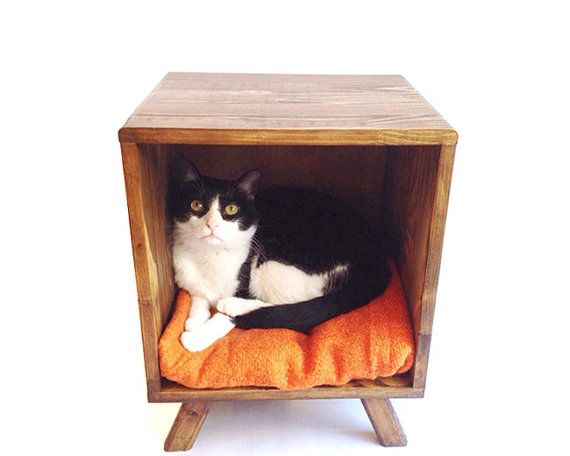
Repurpose crates into stylish side tables
Wire dog crates are functional but ugly. Wooden crates from craft stores or salvaged ones from flea markets are a different story. Flip one on its side, add a cushion inside, and suddenly it’s a dog bed that doubles as an end table. You can stack two for a nightstand, stain or paint them to match your furniture, and even add casters underneath for mobility. The crate gives your dog a den-like space while the top surface holds a lamp, books, or whatever else you’d typically put on a table. This works exceptionally well in small spaces where every piece of furniture needs to do double duty. Instead of a dog bed taking up floor space and a side table taking up more, you’ve combined them into one. It also keeps the dog bed from looking like an eyesore—guests won’t immediately clock it as pet furniture unless your dog is actively napping inside.
Create a feeding station with storage
Pet food bags, bowls, and accessories tend to clutter up kitchens or mudrooms. A simple feeding station solves that by consolidating everything into one spot. You can build one from a small cabinet or dresser—pull out a drawer, cut gaps in the top for bowls, and use the remaining space to store food and supplies. The bowls sit at a comfortable height for your pet, and all the mess stays contained in one piece of furniture. Elevated feeding stations are better for larger dogs anyway, reducing strain on their necks and joints. And having everything in one place means you’re not hunting for the scoop or tripping over the food bag every time you walk into the kitchen. It’s not complicated to build, but it makes daily feeding routines significantly less chaotic.
Use PVC pipe for custom cat trees
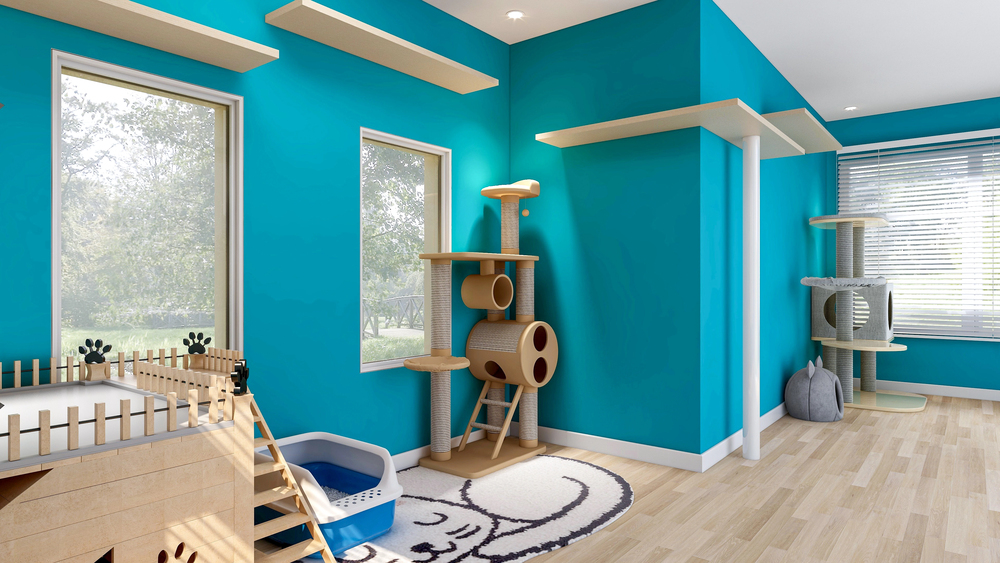
Store-bought cat trees are either flimsy and cheap or well-made and absurdly expensive. PVC pipe offers a middle ground—it’s sturdy, lightweight, and easy to work with, even if you’ve never built anything before. You can design a tree that fits your exact space, add platforms at the heights your cat prefers, and wrap sections in sisal rope for scratching. The whole thing can be disassembled and reconfigured if you move or if your cat’s preferences change. PVC also doesn’t look as DIY as you might think, especially if you paint it or cover it with fabric. The structure is rock-solid, which matters for cats that like to launch themselves from the top of the refrigerator onto their climbing tower. And because you’re building it yourself, you can customize it for multiple cats, add hideaway boxes, or keep it minimal if you’re working with limited space. It’s endlessly adaptable.
Transform bookshelves into climbing walls
If you’ve got an empty wall and a cat that climbs everything anyway, turning a bookshelf on its side and mounting it horizontally creates an instant climbing structure. Add some cushions or carpet remnants to the shelves, and your cat has a series of platforms to jump between. You can even stagger multiple shelves at different heights for a more complex setup. It’s basically a cat highway that keeps them off your actual furniture. This works particularly well in apartments or smaller homes where floor space is tight but wall space is available. Cats naturally want vertical territory, and giving them designated climbing areas means they’re less likely to scale your curtains or knock things off counters. The bookshelf approach is also easy to expand—add another shelf, rearrange the layout, or incorporate scratching posts into the structure. It grows with your cat’s needs.
Make a hideaway from storage ottomans
Small pets—rabbits, guinea pigs, even shy cats—love having enclosed spaces to retreat to. A fabric storage ottoman with a removable lid makes a perfect hideaway. Cut an entrance gap in one side, line the inside with soft bedding, and you’ve got a cozy den that blends into your living room. When your pet isn’t using it, it’s still functional storage or extra seating. This is especially useful for animals that get nervous around guests or loud noises. They have a safe spot to disappear into that doesn’t look like a cage or carrier. And because it’s soft-sided, it’s quieter than hard plastic hideaways when pets bump around inside. The entrance gap can be as simple as cutting a circle with a utility knife, and if you’re worried about fraying, you can reinforce it with fabric glue or binding tape.
Build scratching posts from table legs
Old table legs, fence posts, or even sturdy branches can become scratching posts with some sisal rope and a stable base. Wrap the post tightly with rope, secure it to a sturdy wooden base, and you’ve got a scratching post for a fraction of the cost of buying one. Cats don’t care about aesthetics—they care about texture and stability. A homemade post wrapped in quality sisal works just as well as the expensive versions. You can customize the height based on your cat’s size and preferences. Some cats like tall posts they can stretch on, others prefer shorter ones they can scratch while sitting. You can also add multiple posts at different angles or attach them to existing furniture for a multi-level setup. The key is making sure the base is weighted or screwed down so the whole thing doesn’t wobble. A shaky scratching post won’t get used.
Use ramps for accessibility
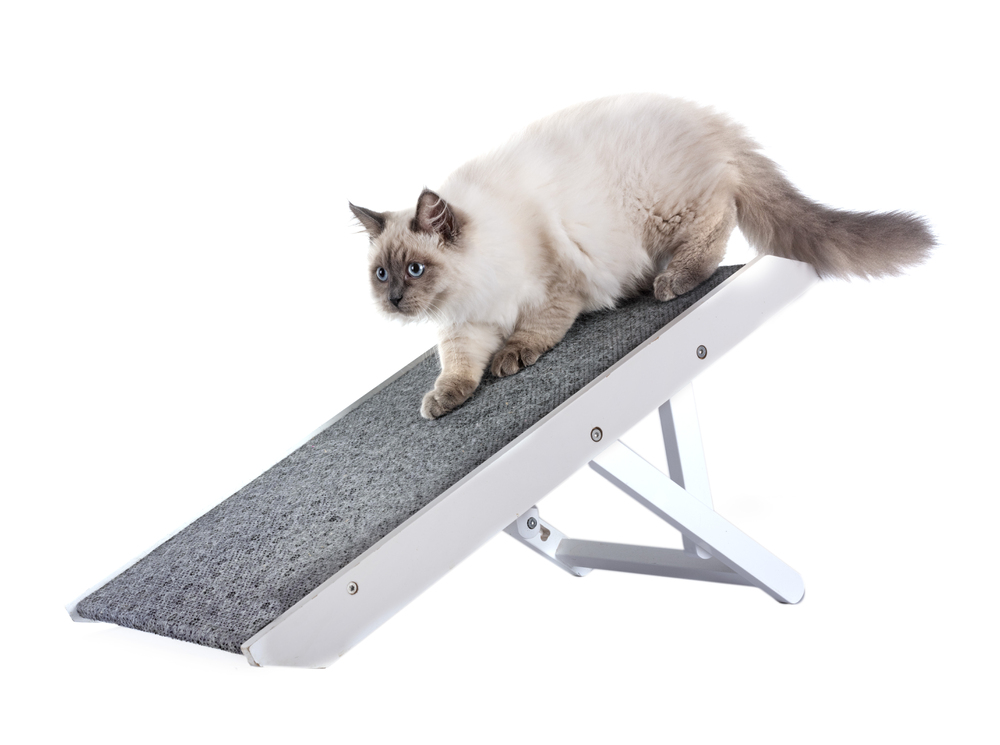
Older pets or those with joint issues struggle with stairs and jumping. A simple ramp changes that, giving them access to couches, beds, or cars without the strain. You can build a basic ramp from plywood and a few 2x4s, then cover it with carpet or rubber matting for traction. The angle matters—too steep and they won’t use it, too shallow and it takes up too much space. Aim for a gentle incline that feels natural for them to walk up. Ramps don’t have to be permanent or clunky. Foldable designs store easily when not in use, and lightweight materials make them portable. Some people build ramps that double as storage underneath or integrate into existing furniture so they’re less noticeable. The goal is function, but there’s no reason it can’t look intentional rather than like medical equipment.
Why DIY makes sense
Store-bought pet furniture is designed for mass appeal, which means it’s often overpriced, poorly made, or just not quite right for your space or your pet’s habits. Building your own lets you adjust for size, durability, and style in ways that off-the-shelf products don’t. You’re not locked into beige carpet towers or beds covered in paw prints. You can make something that fits your home and actually gets used. The other advantage is that DIY projects are easier to replace or modify when pets destroy them, which they will. A homemade scratching post that gets shredded isn’t a $60 loss—it’s a ten-dollar project you can rebuild in an afternoon. That freedom to experiment and iterate without breaking the bank makes DIY pet furniture not just clever, but practical in the long run. Your pets get what they need, your home looks better, and your wallet stays intact. That’s a win across the board.
Post a Comment for "Smart DIY Pet Furniture Concepts"
Post a Comment